Introduction: Why This Blog Exists
The Atomic Redster STI 150 is not designed to be comfortable out of the box. It is designed to win races.
With an extremely narrow last, aggressive stance, and a high flex rating, this boot demands a precise, methodical fitting process. For most skiers—even experienced ones—putting an STI 150 on for the first time is a shock. For me, it was clear within seconds that these boots were nowhere close to fitting my feet out of the box.
As a boot fitter and aspiring ski racer, I decided to make these boots my project for the ski season. I am used to generous fitting mid-volume boots that need to be modified to fit my wide feet. The Atomic STI 150 at a 26.5 has a 93 mm last, much more narrow than my 108 mm right foot...
This blog is a living journal documenting every step of the fitting process required to turn a raw World Cup–level race boot into a functional, high-performance tool. Nothing is skipped. Nothing is sugar-coated.
I’ll be sharing:
-
Initial fit analysis
-
Pain points and movement limitations
-
Punching, grinding, and shell shaping
-
Liner work and modifications
-
Stance and alignment adjustments
-
On-snow testing and feedback
-
What worked, what didn’t, and what changed
Photos and videos will be added throughout the process.
This is not a guide for beginners. It’s an honest look at what it actually takes to fit an elite-level ski boot—and why professional boot fitting matters more than any spec sheet.
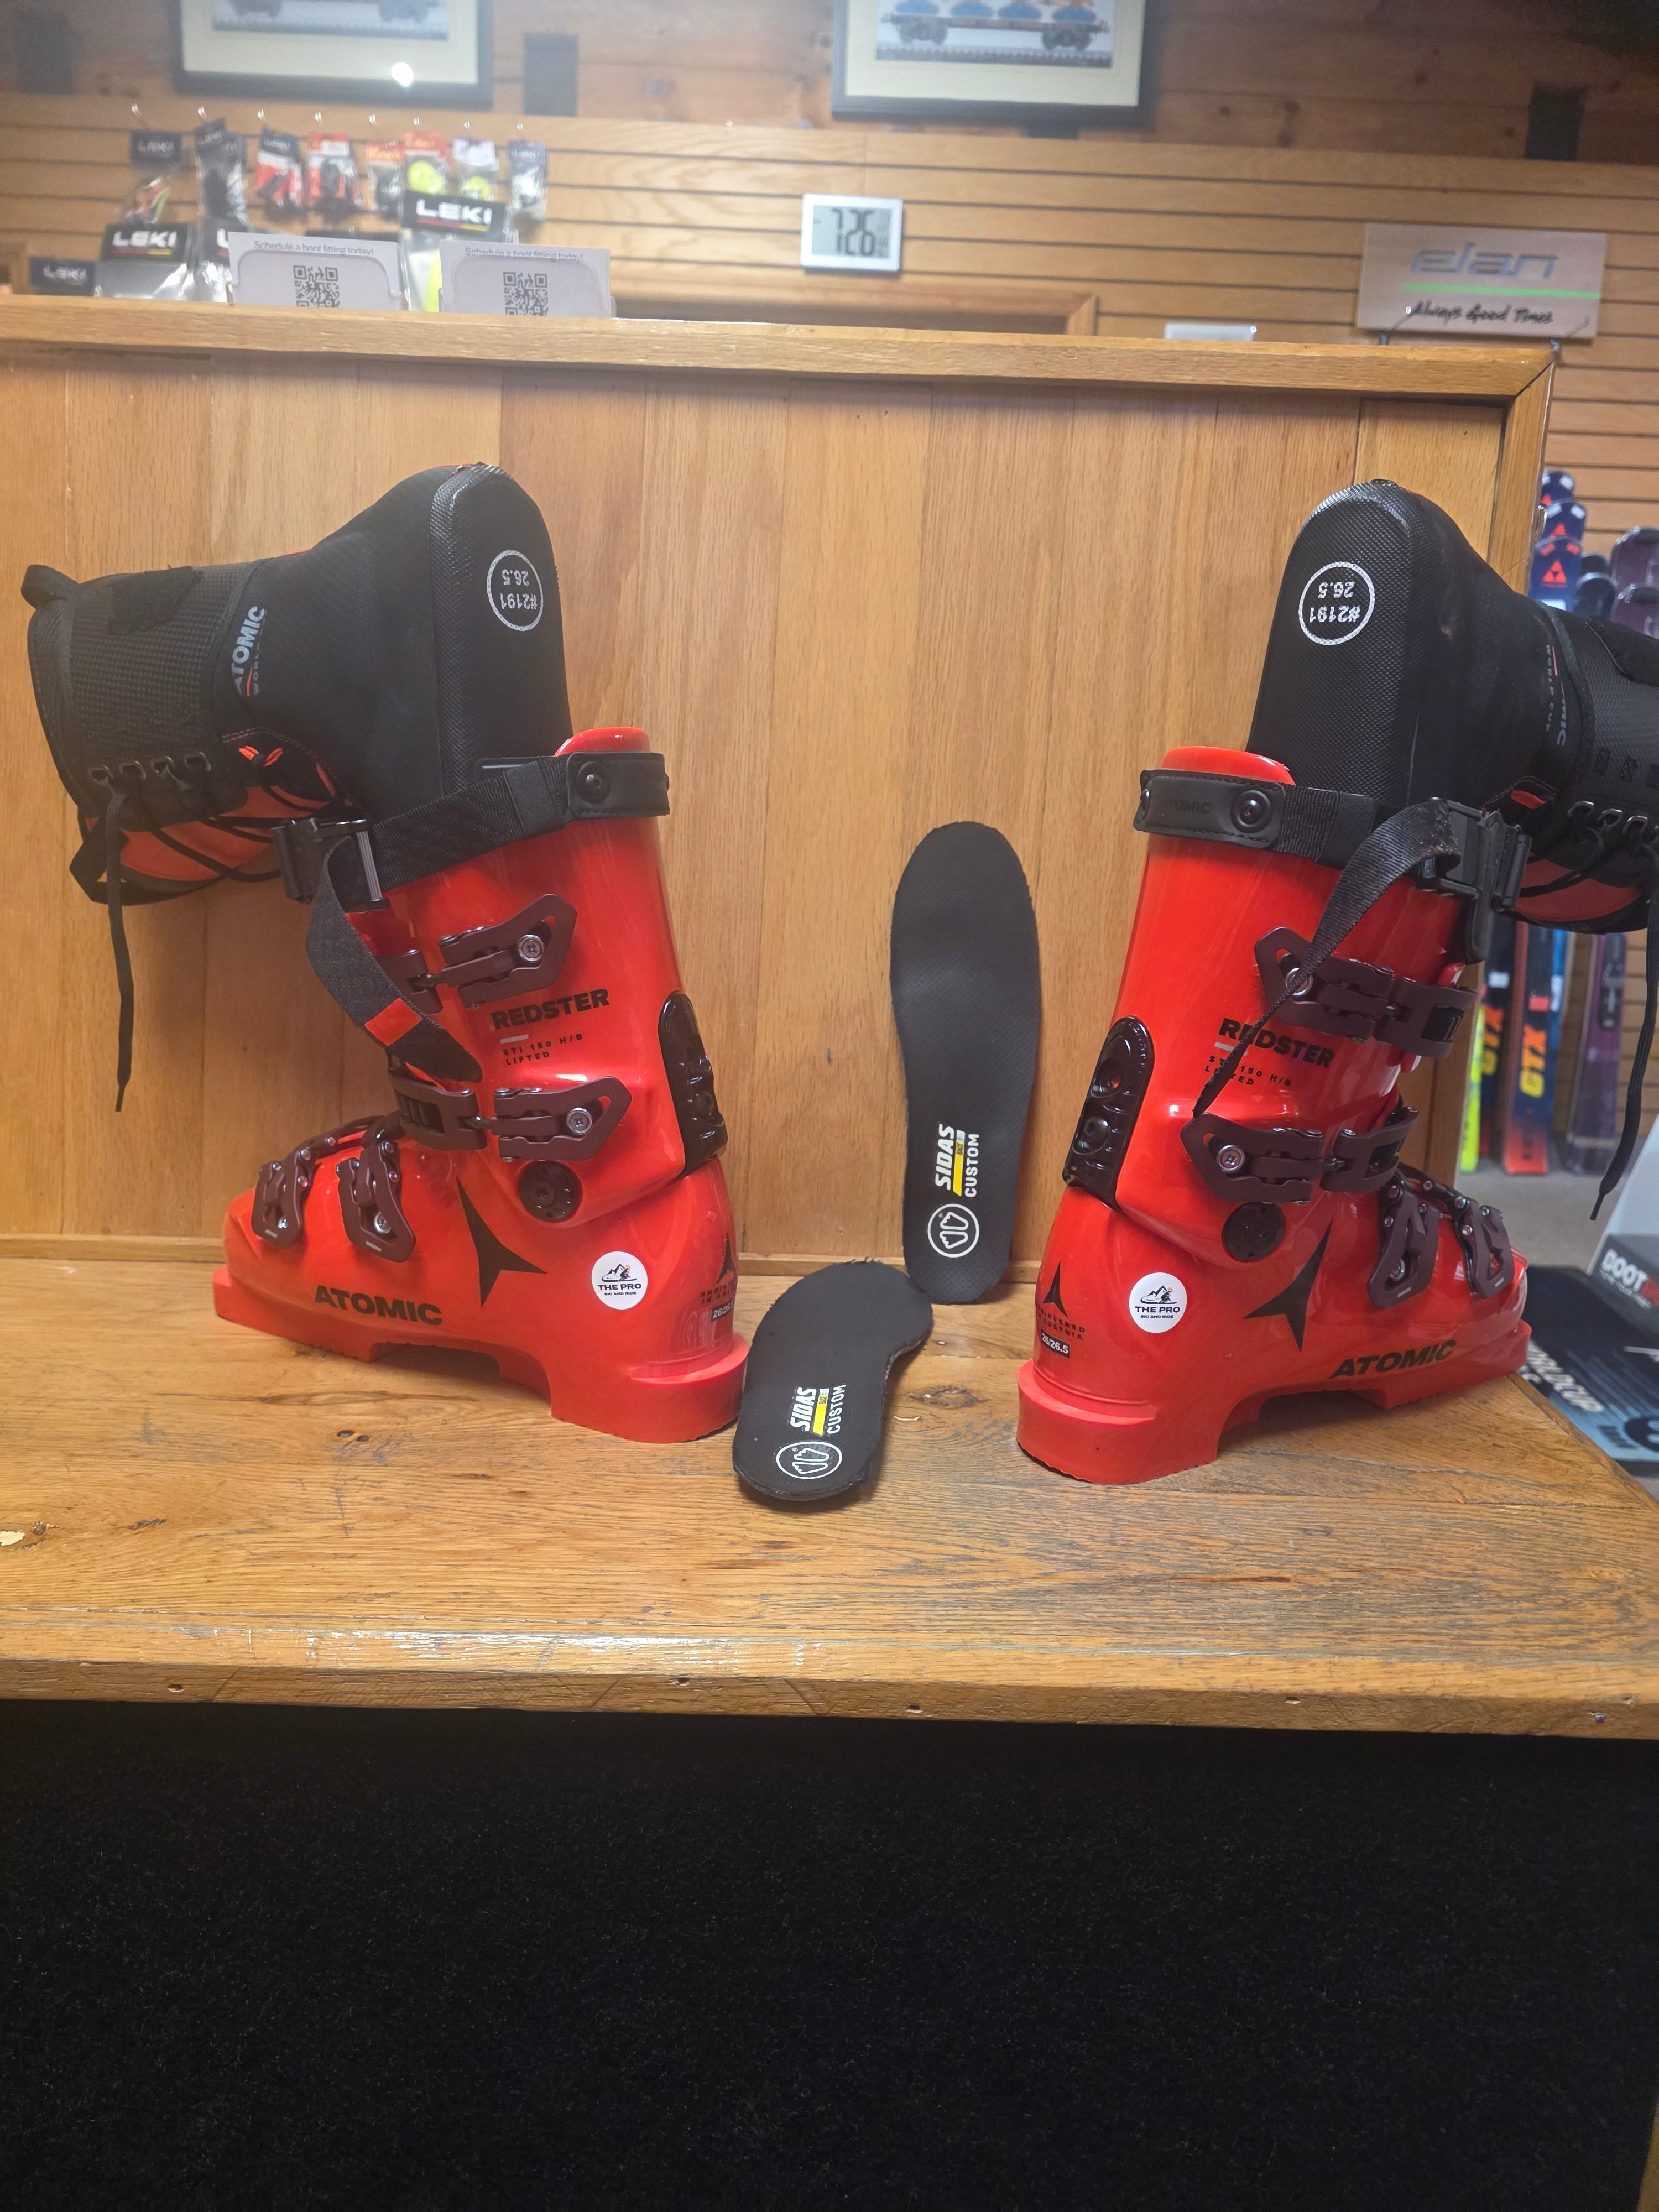
Boot Fit Update #1 - Unboxing
Date: January 2, 2026 | Location: The Pro Ski and Ride | Time Spent: .25 hours

The first step was to unbox the ski boots and take a look at all of he optional accessories. The Atomic Redster STI 150 comes with laceup WC liners, laces, volume reduction shims, spoilers, and additional bolts. Out of the box, I removed the spoilers to allow for room for my calves and added the laces to the liners to promote more shin contact in the front of the boot. The boot is already tight and stiff so there is no need for shims or additional bolts at this time.
Boot Fit Update #2 - Footbed Modification
Date: January 2, 2026 | Location: The Pro Ski and Ride | Time Spent: .25 hours (.5 hours total)

For these boots, I decided I would use a pair of Sidas carbon fiber footbeds I had a colleague previously cast for me. These were used for testing in a previous pair of boots. Although they were made for a narrow race boot, they needed to be ground significantly more narrow and have the heel cup reduced to fit properly in these boots.
Boot Fit Update #3 - Routering
Date: January 2, 2026 | Location: The Pro Ski and Ride | Time Spent: .25 hours (.75 hours total)

Video coming soon!
The Atomic Redster STI 150 ski boots come with a solid sole that has a built in 5 mm lifter. Out of the box, these boots cannot be used in a ski binding without modification. To prepare these for use, the heels and toes must be routed to confirm with DIN height standards to proper safely in an alpine ski binding.
After some setup, I flattened the sole of the ski boot on a belt sander since there was some rock in the sole out of the box. With the soles flat, I routed both heels and toes. After confirming the heights were correct, I used a Foredom flapper to lightly sand the bevel on the heels and toes to take away the sharp edge, making it less likely to get damaged by bindings.
Boot Fit Update #4 - Initial Try On
Date: January 2, 2026 | Location: The Pro Ski and Ride | Time Spent: .25 hours (1 hour total)

Boot Fit Update #5 - Heat Molding and Buckles Moved
Date: January 2, 2026 | Location: The Pro Ski and Ride | Time Spent: .25 hours (1.25 hours total)

Last items on the agenda for the night were to heat mold the liners and the ladders over on the cuff. Although this ski boot has a thin liner, there is still some heat moldable material that will help things feel slightly better than the boot out of the box.
Standing in a skiing position during the cooling process produces the best results.
Boot Update #6 - Initial Shell Modifications
Date: January 18, 2026 | Location: The Pro Ski and Ride | Time Spent: 3 hours (4.25 hours total)

Over the course of the month of January I continued working on the Atomic boots to achieve the following before testing them on snow:
UPPER CUFF
- Softening the boot - This was done by removing the cuff and deepening the U-shape on the sides of the lower clog of each boot. Material was also removed from below the second buckle. This allows the boot to flex easier but still keep the strong spine intact.
- Lowering the cuff - As a short skier with large calves (or the more polite sounding "athletic calves) the boot has too much effective forward lean for me out of the box. To reduce the effective forward lean, I cut the top part of the rear cuff off the boot to allow for more space for my calf. This will allow me to stand slightly more upright in the boot but still at an aggressive racing stance.
LOWER CLOG
- Lateral forefoot stretches - My foot would not sit flat in the boot without the liner due to my forefoot being wider than the internal plastic shell. To create this space, both ski boots were stretched on the lateral (outside) under both buckles. To achieve this, a boot spreader was put in each boot one at a time, the plastic was heated to ~250 degrees fahrenheit, then the boot was spread to allow for about 4mm of additional space. The boot was left to cool to room temperature.
- Bunion punches - I still needed more width in the forefoot after the initial stretches so I moved to the medial or inside of the boot to punch out for where my foot is widest, at the bunion. This was done on our Tecnica Press using a die that mimics a bunion on the big toe joint.
- Toe punches - Toe punches are often used to get more length in the ski boot. In this case, it was done to reshape the toe box to allow for more height and width, not length. A wooden toe closely resembling the shape of my forefoot was put into each ski boot. The boots were then heated, stretched, and left to cool
The results of the stretching:

- Grinding for bunions - Even with all of the stretching my feet were still touching the inside of the plastic on my bunions, or a large bony bit where my big toe joint is. To accommodate for this I ground away some of the material on the inside of both boots to increase comfort.
After these modifications were made, I reattached the upper cuffs to the lower clogs. While doing this I changed the cuff alignment to better match my anatomy. The cuffs were lowered on the inside and raised on the outside to better align my shin bone to the center of the cuff. This was done by rotating the cuff alignment pieces that attach the upper and lower on either side of the cuff.

Boot Update #7 - Additional Liner Tongue Modification
Dates: January 18, 2026 | Location: The Pro Ski and Ride | Time Spent: .25 hours (4.5 hours total)
 After performing the shell stretches, I still felt pressure on top of both insteps. To help relieve this pressure, I lightly ground away some of the plastic on top if the instep with the tongue removed from the liner. This is to soften the plastic so it does not feel as "hard" on the top of the foot. I also heated up the area with a heat gun and punched up to increase how much room there is over the instep in the liner.
I also did a slight bootboard grind from the midfoot through the toe box to create additional room in the instep and slightly increase ramp angle.
Boot Update #8 - Big Toe Punch
Dates: January 19, 2026 | Location: The Pro Ski and Ride | Time Spent: .5 hours (5 hours total)
I wanted these boots as ready as possible for the Stratton on Snow Test coming up in early February. My right big toe still had too much pressure on the side for my comfort level so a big toe punch was performed to create some additional volume in the toe box.
Boot Update #9 - On Snow Testing
Dates: February 3, 2026 | Location: Stratton Mountain | Time Spent: 1.5 hours (6.5 hours total)

The Pro Ski and Ride attended the Stratton On Snow Demo the first week of February to test equipment for the 2026/2027 season! At the test, I took the time to try out the Atomic Race Boots for the first time. After testing equipment all morning in my Fischer RC4 Pro BOA MV ZipFit boots, I met up with some friends, through the Redsters on, and grabbed a pair of Blizzard HRC skis to test these out! The experience was eye opening:
The Good: Surprisingly I had no discomfort at first walking around the demo to grab skis and sitting in the gondola for the first run. The rearfoot stability is something I never experienced from another pair of boots, including recreational race boots. The more aggressive I got on the skis, the more secure my heels felt in the rear; almost like a vice grip (but in a positive way). There was no lateral delay in the boots. While skiing these boots did everything I asked of them and more.
The Bad: Once a run was over and my feet were out of skiing position, I could feel every muscle that has been used in my feet. Most pressure was still coming from a lack of instep room that slowly put my feet to sleep in just over an hour. Because of the precise fit and narrow skis the misalignment from not being canted was magnified. I was never so aware of how out of alignment I was until this setup.
The Verdict: I did not expect to last past two runs, so the fact I was able to stay in these over an hour on snow was a win in my book. Instep height and canting would need to be addressed prior to going on snow again.
Boot Update #9 - Bootboard Mishaps
Dates: February 7, 2026 - March 1, 2026 | Location: The Pro Ski and Ride| Time Spent: 1 hours (7.5 hours total)

I began taking my boots apart in the shop after the on snow test to perform more work. To my surprise the right bootboard came out in two pieces! The instep was so tight in the boot that the bootboard must have slid forward and snapped while skiing. Atomic warrantied the bootboard and sent a replacement pair.
Fast forward a week later and I snapped the second bootboard while putting the right boot on in the ski shop. At this point I ordered 3 more pairs from Atomic to have as backup.
Compared to other race boots I have worked on, Atomic's Redster STI bootboard is rather thin and is not secured. Because of this, there is a little play fore and aft in the boot. To stop this play, I worked with my head tech to secure the bootboard to the lower clog. This was done by countersinking a screw in the bootboard and affixing it to the plastic below.
Boot Update #10 - Instep Punch
Dates: February 7, 2026| Location: The Pro Ski and Ride| Time Spent: .75 hours (8.25 hours total)

Despite the broken bootboard, I was able to patch it together to continue work on the boots. Former World Cup athlete and current Hunter Mountain Coach, Besnik Sokoli, has experience with these boots and suggested heating up the plastic on top of the instep to create the needed space. He has performed this on many of his race boots to create volume without creating excess space.
Padding was added to my feet under the sock on top of the instep. I then laced up the liners in preparation for the stretch. The shell was put in an Atomic Boot Spreader which allowed me to precisely target the plastic over the instep with a heat gun. With the plastic hot, I carefully stepped into the boot using the spreader. I then buckled the boots snuggly to stretch the plastic over the instep. The theory is that the plastic will stretch and cool over the instep creating the needed space when the padding is removed.
Lastly, gaffers tape was added over the toe dam for waterproofing as there was a noticeable gap after this stretch was performed.
Boot Update #11 - Toe Box Height Grind
Dates: February 13, 2026| Location: The Pro Ski and Ride| Time Spent: .25 hours (8.5 hours total)
The punch helped the instep, but there was still too much tightness above the big toe on my right boot. To alleviate this, I ground away some plastic above the big toe on the root boot to create volume.
Boot Update #12 - Advanced Stance Alignment
Dates: February 13, 2026| Location: The Pro Ski and Ride| Time Spent: .5 hours (9 hours total)

As discussed previously, my boots have custom footbeds and have been cuff aligned but still felt off alignment wise. During a slow afternoon at the ski shop I had Kathy Ebbers of my team help with a lateral Advanced Stance Alignment using our Atomic Canting Assessment Kit. We marked the center of knee mass and tried different canting wedges to find what felt flat to me as the skier as well as what looked best visually. Fortunately we found 1 degree cant out on the right foot and .5 degree cant out on the left foot worked best and we ordered canted lifters to be installed at a later date!
Boot Update #13 - Canting
Dates: March 1, 2026| Location: The Pro Ski and Ride| Time Spent: .5 hours (9.5 hours total)

With the canted lifters in the shop, we plated the bottom of the boots to achieve the necessary cant for each boot. Because material was added to the bottom of the boots, both boots once again needed to be routed to conform to DIN standards.
Plans for 2026/2027!
9.5 hours of work on the boots including only 1.5 hours on snow, I plan to get on these a lot more next season! In August I will be attending a workshop at Big Snow in New Jersey to get additional on snow feedback from the boots and have other boot fitters review the modifications for critiques and suggestions. The goal is to get these boots to a level that I can reasonably ski on them for 2 - 3 hours for race training.
This blog will be updated throughout the summer with videos as we work to edit those for hosting on YouTube.